
In this quick tip tutorial we will explain how to create a plastic switch in Photoshop that you can use in your interface designs. Let’s get started!
Creating the Background
Create a new file. Set Width to 400 and Height to 300 and the resolution to 72 PPI.
Now make a new Group and name it Background. Using Rectangle Tool (U) draw a shape bigger than the canvas, just like the one in the example. Set the color to white #ffffff and apply the layer styles.
Creating the Button
Create a new Group and name it Base. Using Pen Tool (P) draw a shape just like the one in the example. Set the color to a dark grey #242424 and apply the layer styles. Now our base shape is done.
Create a new Group and name it Button. Using Pen Tool (P) draw a shape like the one in the example. Set the color to #ada397 and apply the layer style.
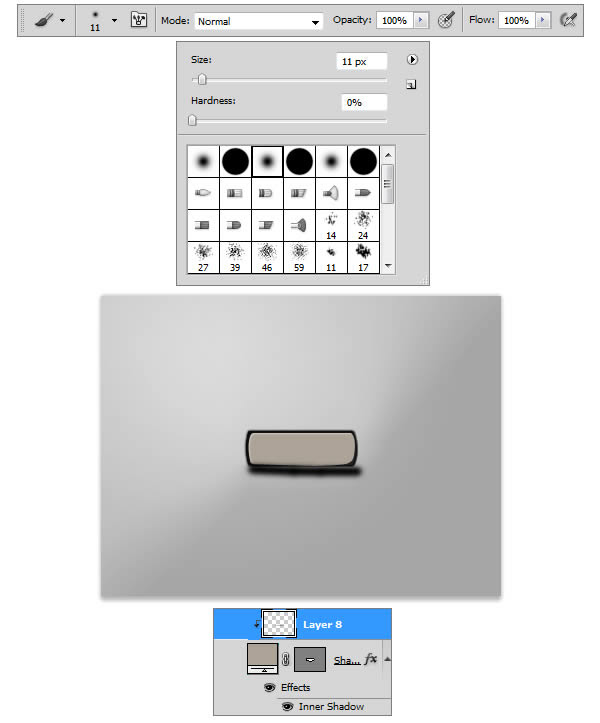
Now to add some volume and detail to the button. Inside the Button Group create a new layer above the button shape and using Brush tool (B), set the foreground color to black #000000, the size of the brush to 11px, and the hardness to 0 and draw a short line at the bottom part of the button, like seen in the example. Transform that layer into a Clipping Mask by holding down the ALT key and pressing between the two layers, or simply right click on the last layer and select Create Clipping Mask.
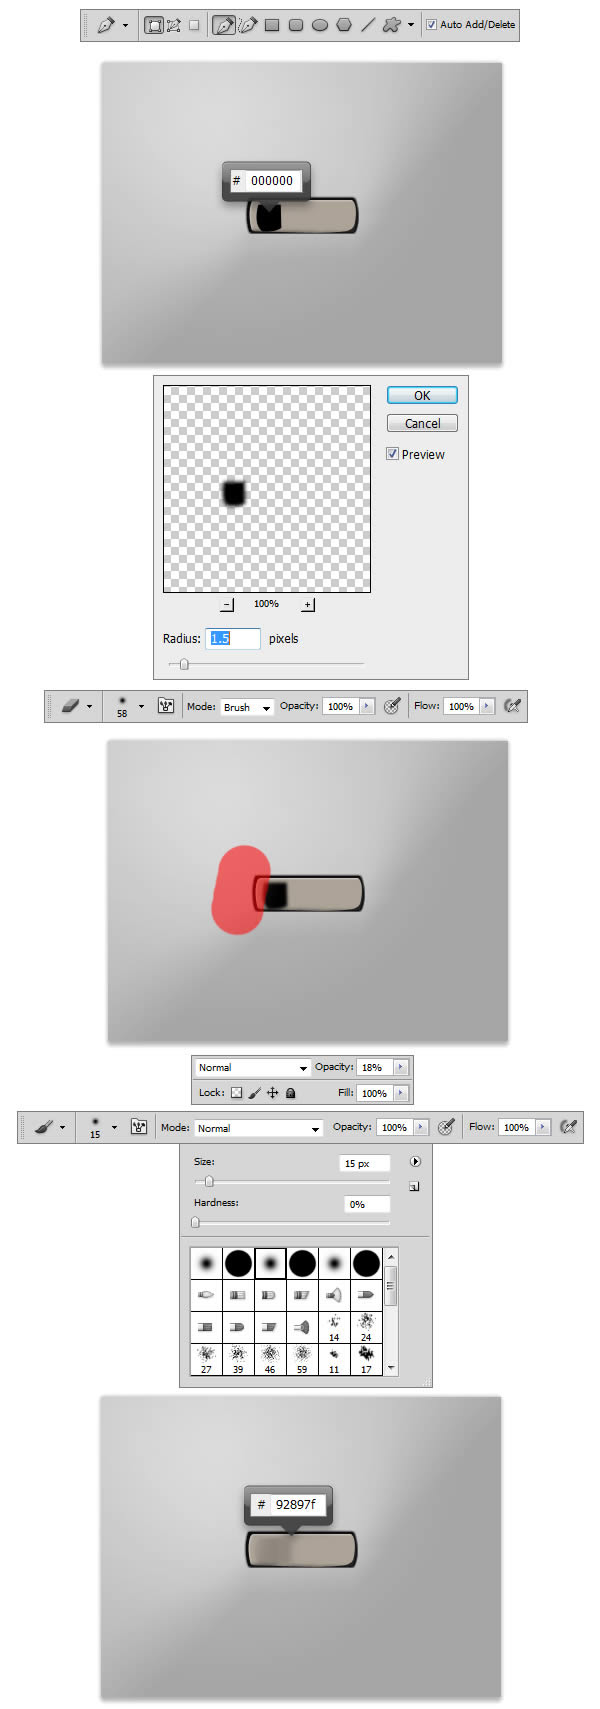
Create a new layer, and using Pen Tool (P) draw a black #000000 shape just like the one in the example. Go to Filter > Blur > Gaussian Blur, set the Radius to 1.5 px and apply the filter. Using the Eraser Tool (E) set the Size to 58 and the Hardness to 0, and brush away the left side of the blurred shape (the red shape in the example marks the spot). Set the Opacity of the layer to 18% and make this layer a Clipping Mask. Now make a new layer, select Brush Tool (B), set the size to 15px and the Hardness to 0, set the color to #92897f and draw a straight line just like the one in the example. When you’re done, transform this layer into a Clipping mask as well.
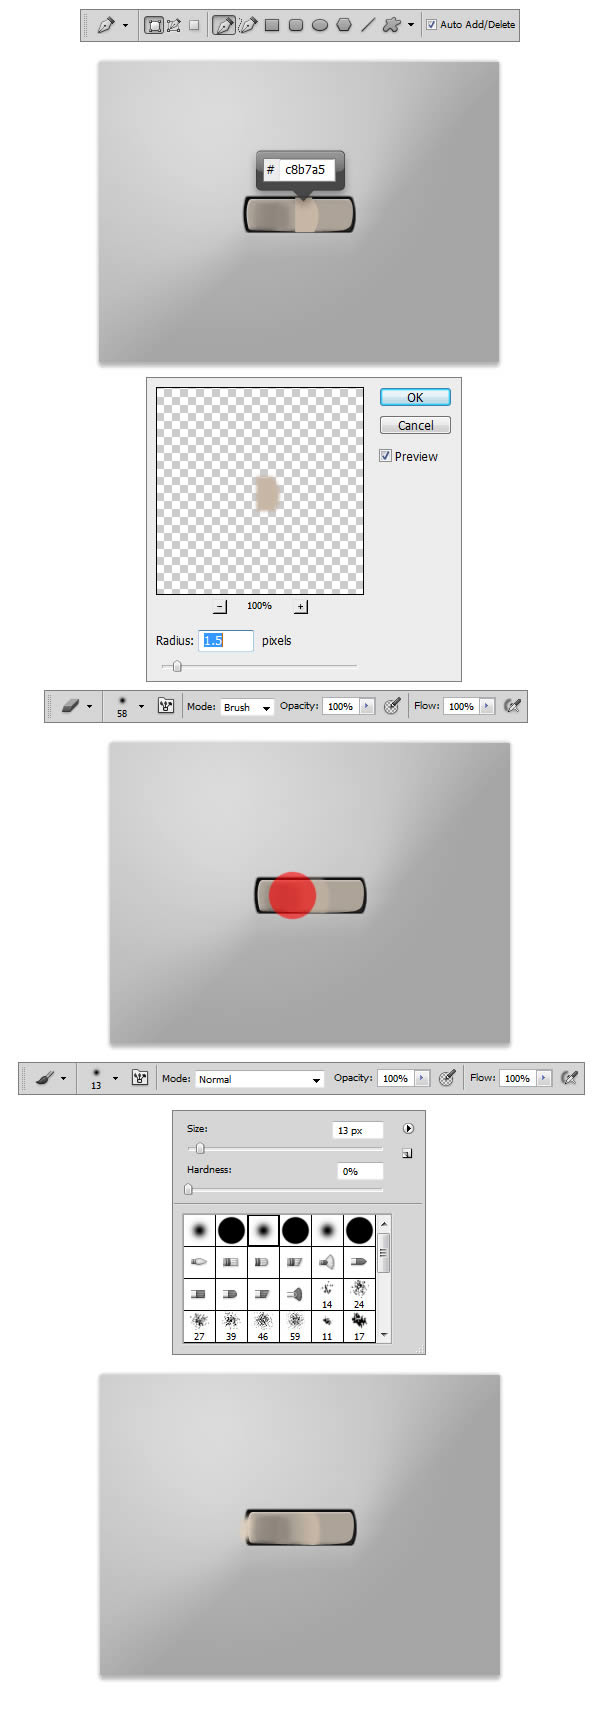
Make a new layer, select Pen Tool (P), set the color to #c8b7a5 and draw a shape like the one in the example. Go to Filter > Blur > Gaussian Blur, set the Radius to 1.5 px and apply the filter. Using the Eraser Tool (E) set the Size to 58 and the Hardness to 0, and brush away the left side of the blurred shape (the red shape in the example marks the spot). Now select Brush Tool (B), set the size to 13px and the Hardness to 0, set the color to #c8b7a5 and draw a straight line just like the one in the example. Make this layer a Clipping Mask.
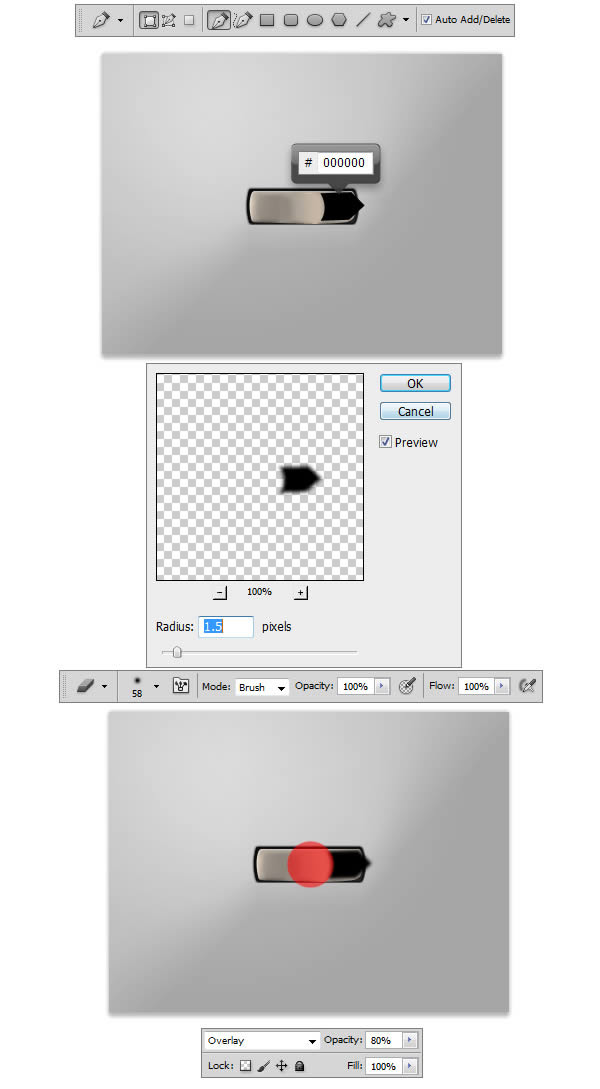
Create a new layer, and using Pen tool (P), set the color to black #000000 and draw a shape like the one in the example. Go to Filter > Blur > Gaussian Blur, set the Radius to 1.5 px and apply the filter. Using the Eraser Tool (E) set the Size to 58 and the Hardness to 0, and brush away the left side of the blurred shape (the red shape in the example marks the spot). Now set the Blending mode for the layer to Overlay, and the Opacity to 80% and transform the layer into a Clipping Mask.
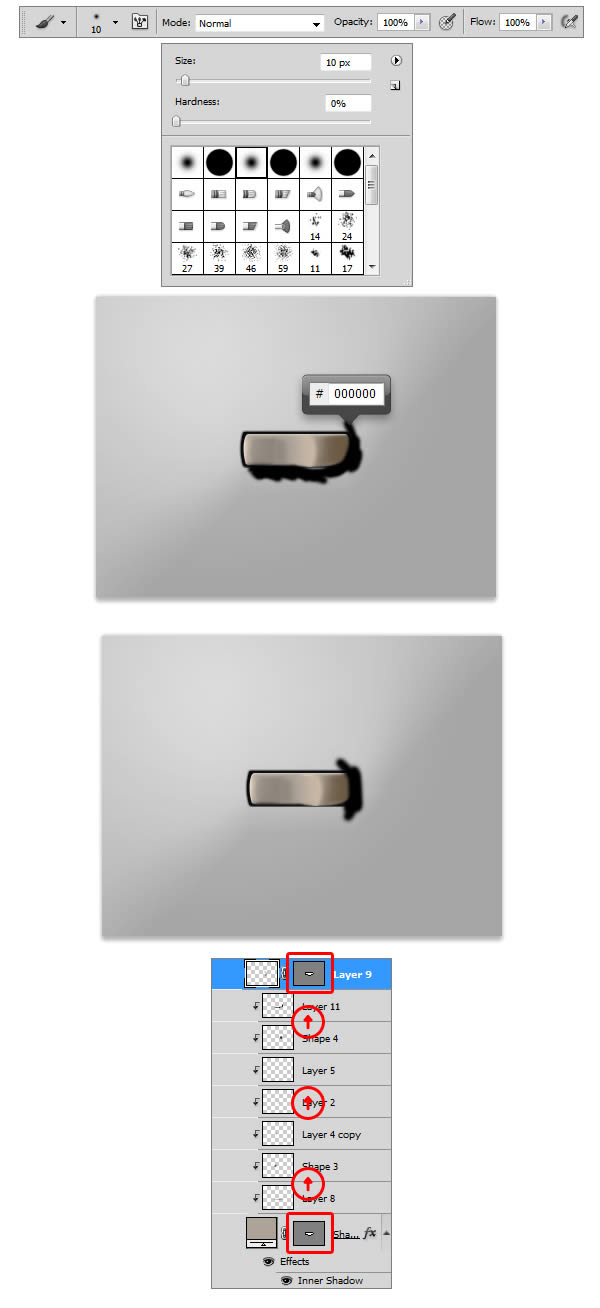
Make a new layer, and using Brush Tool (B), set the Size to 10px, the Hardness to 0%, the color to black #000000 and draw a few line around the bottom and right part of the button as seen in the example. Transform that layer in a Clipping mask, and create a new one. Use Brush tool (B) with the same settings as before, and draw a few more lines on the right side of the button. Now we have to copy the Vector Mask thumbnail of the Button shape to our layer. Holding down the ALT key, click and drag the Vector Mask thumbnail from our Button Shape to this layer exactly like seen in the example. We will not make this layer or any future layers Clipping Masks.
We will make a new layer. Using Pen Tool (P) draw another black #000000 shape just like the one in the example. Go to Filter > Blur > Gaussian Blur, set the Radius to 1.5 px and apply the filter. Set the Opacity of the layer to 20%. Make a new layer, and Using Brush Tool (B) we will add some highlights. Set the Size to 2px, and the Hardness to 0%, set the color to #d5c8b5 and make a small dot near the left top corner of the button. Make another layer, and using Pen Tool (P) we will add some more details. Set the color to #dbcebe and draw three more shapes like the one seen in the example. These highlights will help give more volume and realism to our button.

Create a new Group and place it under Base Group. Name it Shadow. Using Pen Tool (P) set the color to #000000 and draw a shape like the one in the example. Go to Filter > Blur > Gaussian Blur, set the Radius to 1.5 px and apply the filter. Set the Opacity of the layer to 20% and using the Eraser Tool (E), set the size to 58px and the Hardness to 0% and brush away the bottom right part of our shape (red circle indicate the area in the example).
Final Image


{ 0 komentar... read them below or add one }
Posting Komentar