Photoshop layer styles are a popular way to add effects, such as drop shadows and strokes, to layers in a non-destructive way. With the right knowledge and experience, any effect can be achieved. To achieve these effects, however, you need to understand what each setting does and how they can be combined to create a certain look. In this series by John Shaver from Design Panoply, we will explain every aspect of Photoshop’s layer styles feature and show you how to unlock their potential.
In this article, Part 11: How to Properly Add a Stroke Using Photoshop Layer Styles, we will explain the settings behind Stroke, and the ways it can be used to create different effects. Let’s get started.
The Uses for Stroke
The Stroke effect is used to add strokes and borders to layers and shapes. It can be used to create solid-color lines, colorful gradients, as well as patterned borders.
Although you can only apply the Stroke effect once, it can be used in conjunction with other effects to create more interesting and diverse styles.
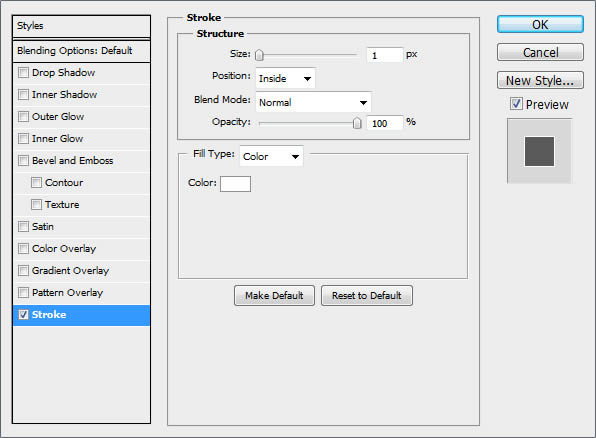
The Layer Styles Stroke Dialog Box
Stroke is one of the easiest effects to work with, because almost all the settings are self explanatory. When you change any of the settings, it’s very easy to see the difference on your canvas.
There are a few tricks to the stroke effect though. Let’s find out what they are.
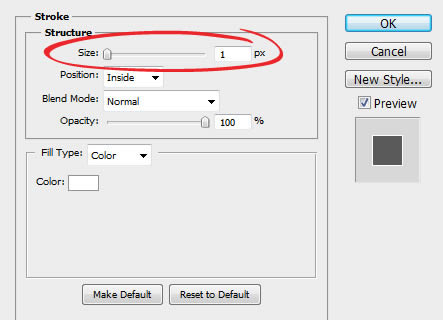
Size
The Size slider simply sets the width of your stroke, anywhere from 1px to 250px.
In the following example, you can see how increasing the stroke size gives us a thicker border around our text.
Position
The position dropdown consists of Outside, Inside, and Center options. This setting controls the alignment of your stroke to the layer it’s applied to in the following ways:
- Outside: Your stroke will be created from the edge of your shape and grow outwards, away from your object
- Inside: Your stroke will be created from the edge of your shape and grow inwards towards the center of your object
- Center: Your stroke will be created from the edge of your shape and grow both inwards and outwards
Choosing different Position settings is helpful when you are combining your Stroke effect with other Layer Style settings.
In the following example, you can see how the Inside position differs from Outside. You will also notice that if your stroke is set to Inside or Center, the part of the Stroke that overlaps with the original shape will also pick up other effects that are applied to the layer. In this case, a slight Bevel & Emboss.
Blend Mode
The Blend Mode allows you to set the blending mode for your Stroke.
Depending on the Position settings you are using, the Blend Mode will affect the layer you are using it on, or the layer beneath it.
If you are unfamiliar with how all the different Blending Modes work, I highly recommend checking out the Blending Is Fun Basix tutorial.
In the following example, you can see how changing the Blend Mode from Normal to Overlay gives the stroke a completely different look as it interacts with other elements of the design.
Opacity
The Opacity sliders controls how transparent our stroke is.
A smaller number here makes your Stroke more transparent, while a higher number is more opaque.
Tip: If you set your stroke to 0% opacity, it will act as a mask and hide areas of the layer it is applied to.
In the following example, you can see that setting the Opacity to 0% creates a mask where the stroke would normally appear.
Fill Type
Fill Type lets you control what fill you want to apply to your Stroke.
It can be a Color, Gradient, or even a Pattern.
Each choice gives us additional options, which are the same as the previous settings we covered in the Gradient Overlay and Pattern Overlay articles of this series.
In the following example, you can see how changing the Fill Type from Color to Gradient lets us create a more believable metallic effect.
Saving and Loading Default Settings
You can save and load default settings for each effect in the Layer Styles dialog box. By clicking "Make Default", Photoshop will store whatever settings are currently active as the new default settings for that effect.
By clicking "Reset to Default", Photoshop will then load whatever settings were last saved. This allows you to experiment and simply reload custom default settings if you want to start over.
One for the Road
Until next time, this free, exclusive layer style and accompanying .PSD will show you how to combine the Stroke effect with other settings to create a cool comic explosion style.


{ 0 komentar... read them below or add one }
Posting Komentar