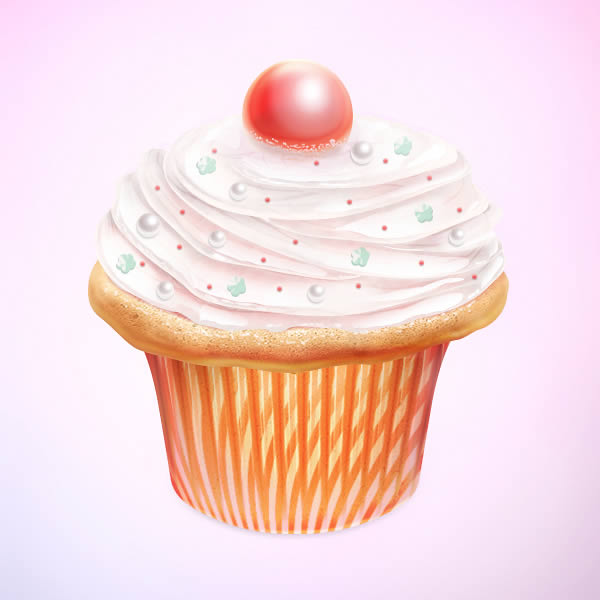
In this tutorial, we will explain how to create a tasty cupcake icon in Photoshop. We will start with a sketch and then add color, texture, and shading to create an icon that looks good enough to eat. Let’s get started!
Tutorial Assets
The following assets were used during the production of this tutorial.
Step 1
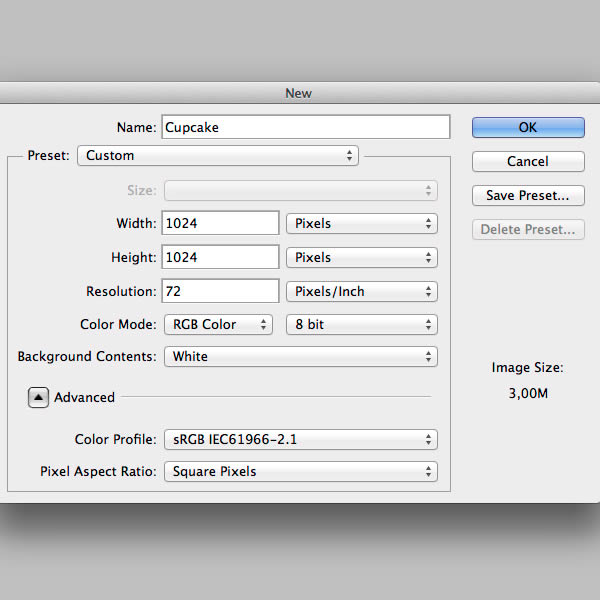
Open a new file and set the canvas resolution to 1024×1024 pixel. Activate the "Icon Grid 512" action from the Actions Panel. You can download the action from the assets above. The action will trace an area of 512×512 pixels, you have to design your icon there. As you know, icons have standard dimensions. For this tutorial we’ll use that resolution.
Step 2
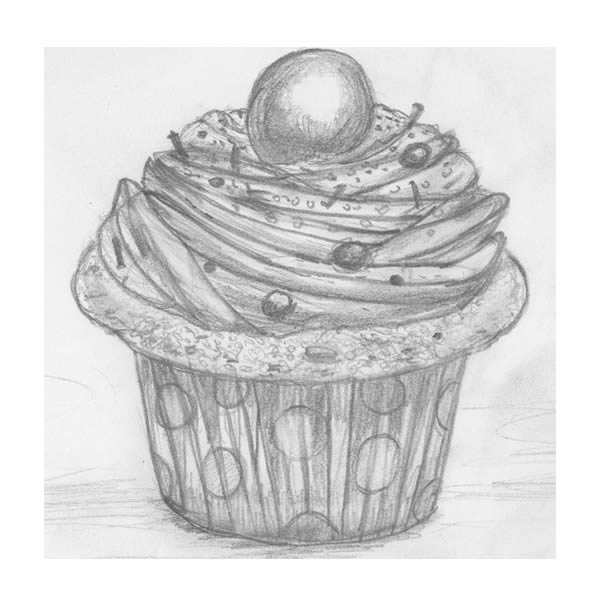
Place the sketch from Assets inside the document.
Step 3
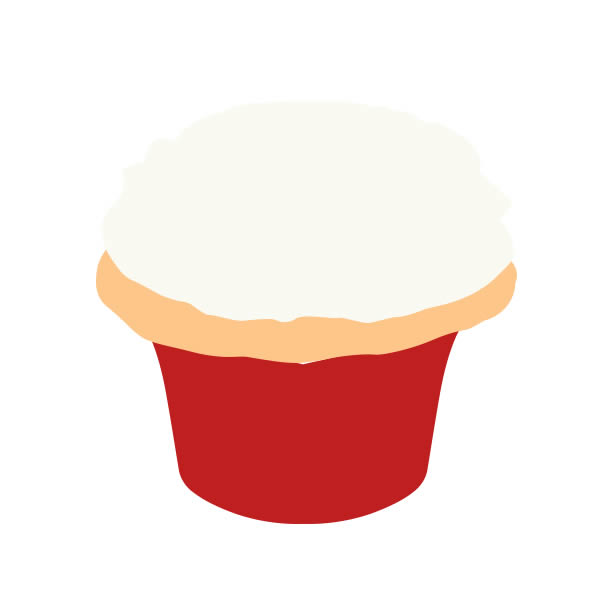
With the Pen Tool (P), start to trace the main shapes of the cupcake. Use different colors for each shape. I refined some curves to achieve a better look.
Step 4
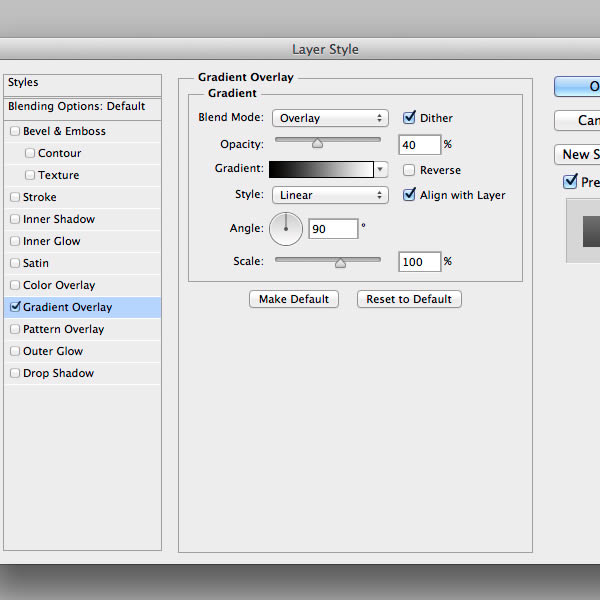
Let’s start with the cup! Add this Layer Style to the base layer.

Step 5
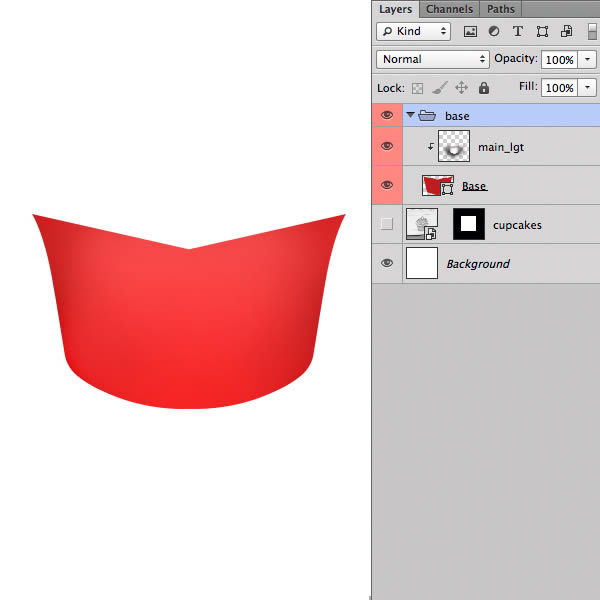
Add a new layer and with the Brush Tool (B) paint a white color spot in the middle of the cup. Set the layer blending mode to Overlay and apply it as a Clipping Mask by clicking in the thin line between the layers in the Layer Panel while clicking Alt.
Step 6
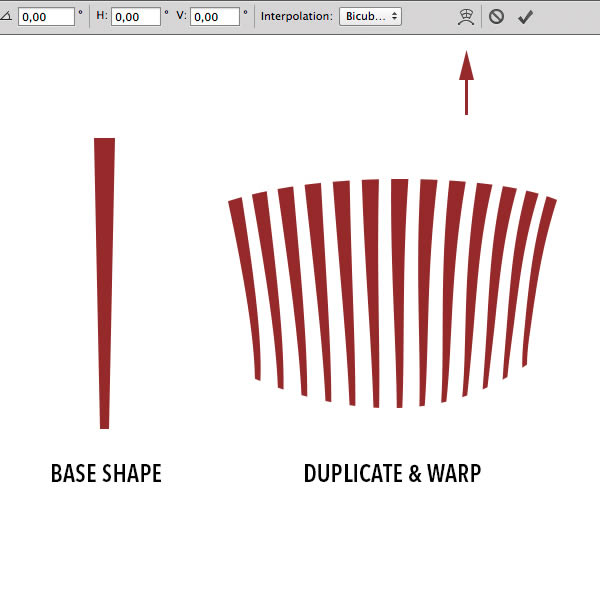
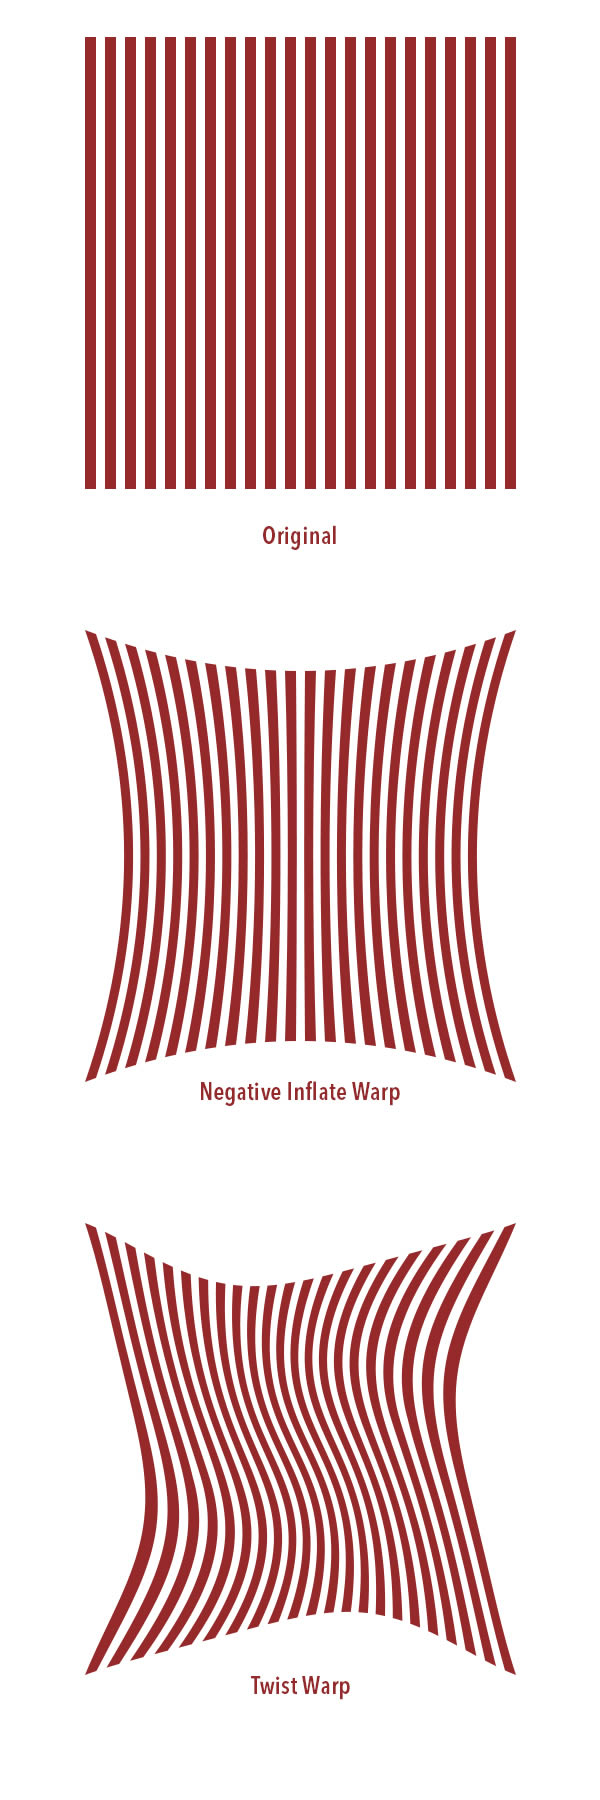
With the Pen Tool draw a dark red shape like below. Then duplicate it 12 times and group them. (In Photoshop CS6 you can merge the shapes inside a single shape vector layer by pressing Cmd/Ctrl + E). Finally apply an Arc Warp, you can do this by pressing with Cmd/Ctrl+T and the click on the warp icon in the option bar. Play with the blend, H, V setting until you get a shape like below.
Step 7
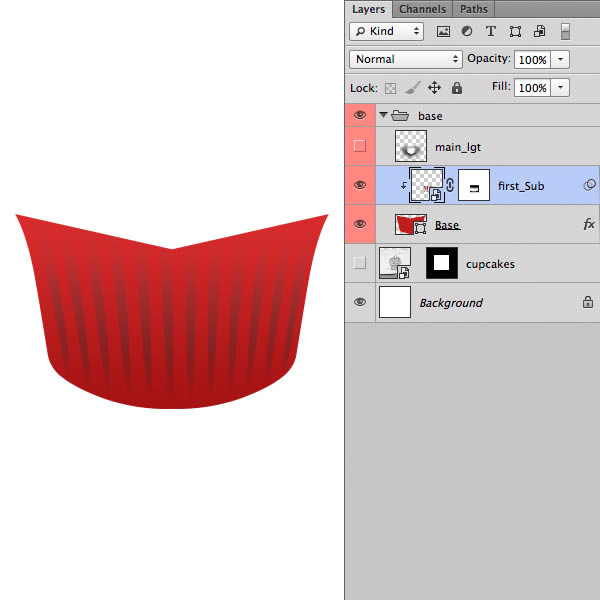
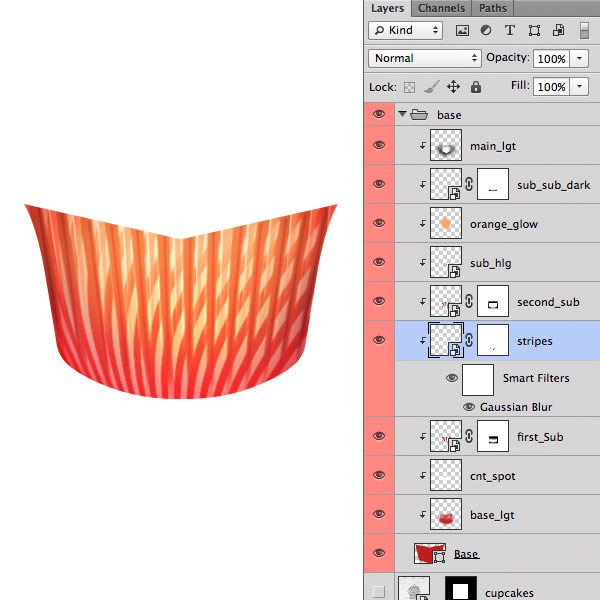
Convert the shape into a Smart Object: Filter > Convert for Smart Filter. Apply a Gaussian Blur filter with a 0.2px Radius. Use a Layer Mask to hide the the top and bottom part of the stripes. (I disabled the visibility of the light layer to see better what happening).
Step 8
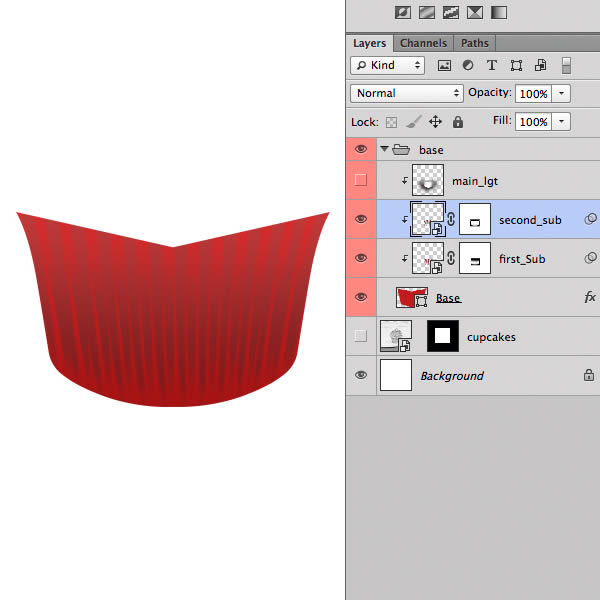
Duplicate the Stripes Smart Object. Click two times into the Smart Gaussian Blur Filter in the Layer Palette and change the radius value to 0.5px. Move the new layer to the left with the Move Tool (V) until you get a result like below.
Step 9
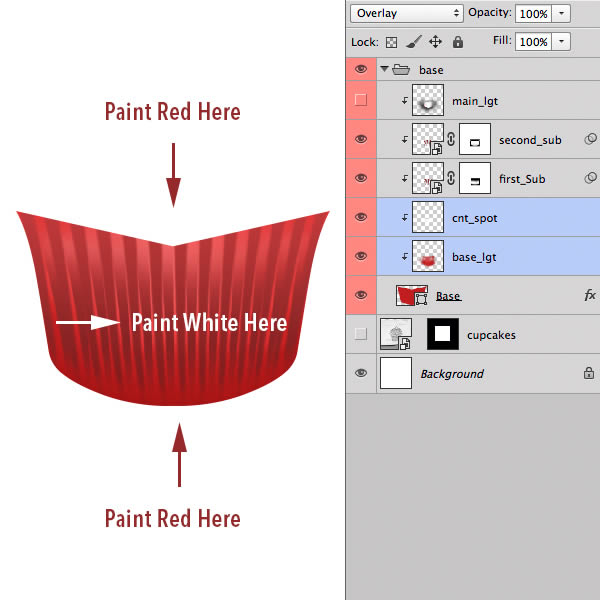
Create two new layers and place them under the stripes layers. With the Brush Tool (B) paint some light red color on top and bottom of the cup. Set the opacity of the layer to 70%. In the second layer, paint some white light spot in the middle of the cup and set the layer in Overlay. See the image for a reference.
Step 10
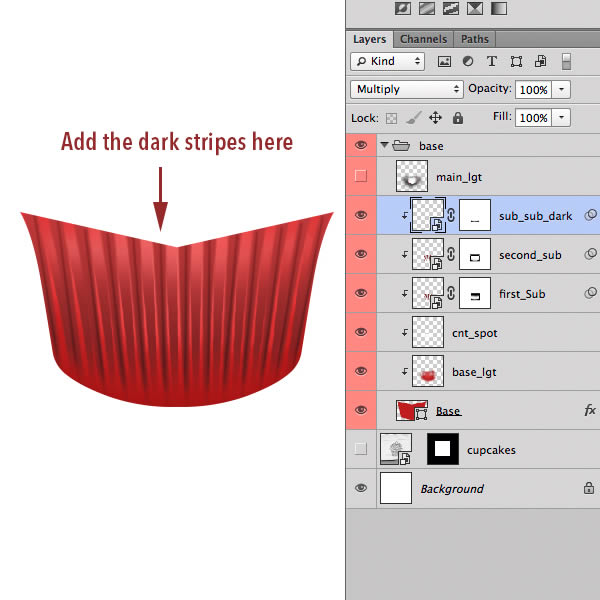
As step 6, add some thin dark stripes between the creases with the Pen Tool (P). Apply a Smart Gaussian Blur Filter to the stripes with a radius of 0.6 pixel. Then apply a Layer Mask to hide the bottom part of the layer, try to achieve a smooth transition.
Step 11
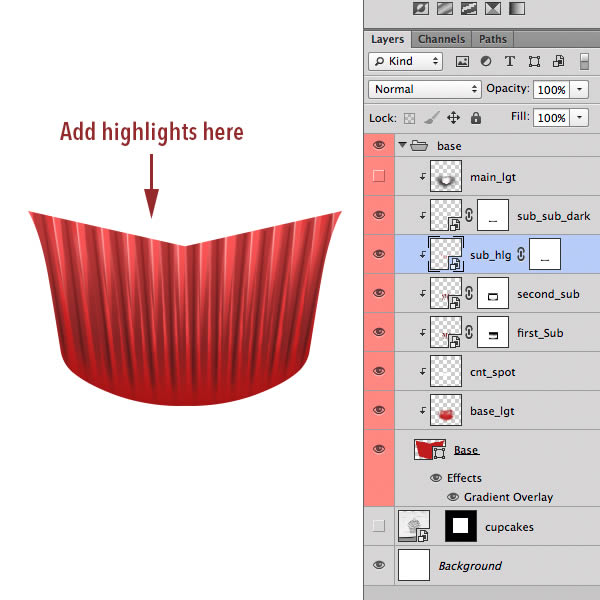
Repeat step 10 but this time add some light red stripes and place them in the left part of each crease. You don’t have to apply the Gaussian Blur filter this time. We’ll do this to make the highlights.
Step 12
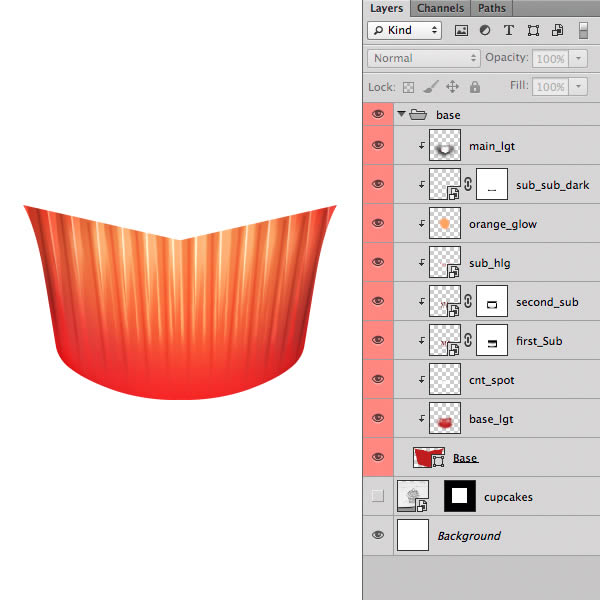
Add a new layer below the dark thin stripe layer, and paint some orange color with the Brush Tool (B). Set the layer to Soft Light.
Step 13
With the Rectangle Tool (U) draw some parallel rectangle shapes and place them below the “second sub” layer. Then apply separately two warp as usual you can do this by pressing with Cmd/Ctrl + T and the click on the warp icon in the option bar. Convert the stripes as a Smart Object and apply a Gaussian Blur of 0.3 pixel. Set the stripes as a Clipping Mask.
Step 14
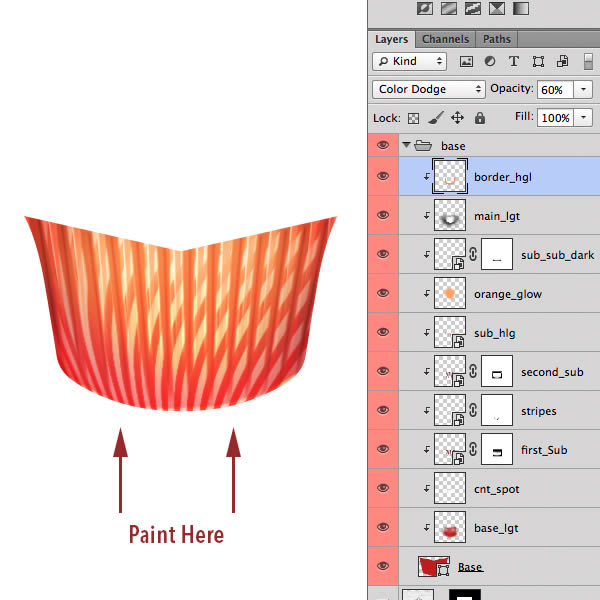
Last step for the cup is to add a new layer on top as a clipping mask and paint with the Brush Tool (B) an orange reflection on the bottom of the cup. Set the layer blending mode to Color Dodge and the Opacity to 60%.
Step 15
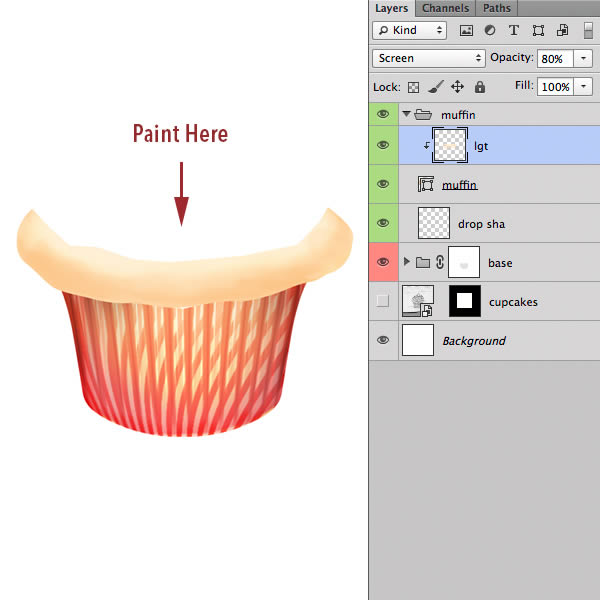
Time for muffin! Add a new layer as a Clipping Mask to the Base Muffin Layer. With the Brush Tool (B) paint a brownish-yellow with a soft brush (try to lower the brush opacity setting) on top on the muffin shape. Then set the Layer Blending Mode to Screen and the Opacity to 80%.
Step 16
Repeat the step 15 but this time we’ll paint shadows. Select a dark brown color (#bc6f3a) then paint on the bottom of the muffin. But this time use the Normal Blending and 100% Opacity. Use the screenshot below as a reference.
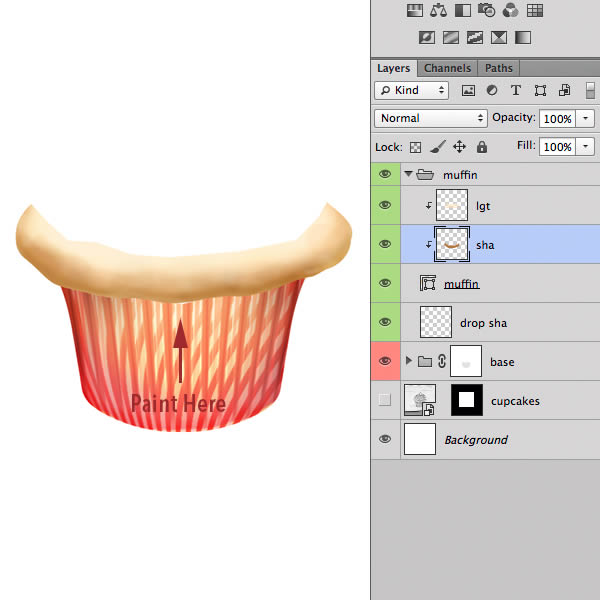
Step 17
Add more details to shadows and lights, same process here. I added two layers: the first is for shadows, I painted more brown color in Color Burn Layer Blending Mode. The second is for lights. In this layer I painted a light brown color (#e5c79c) with a small brush and then I set the Blending Mode of the layer to Overlay and the opacity to 40%.
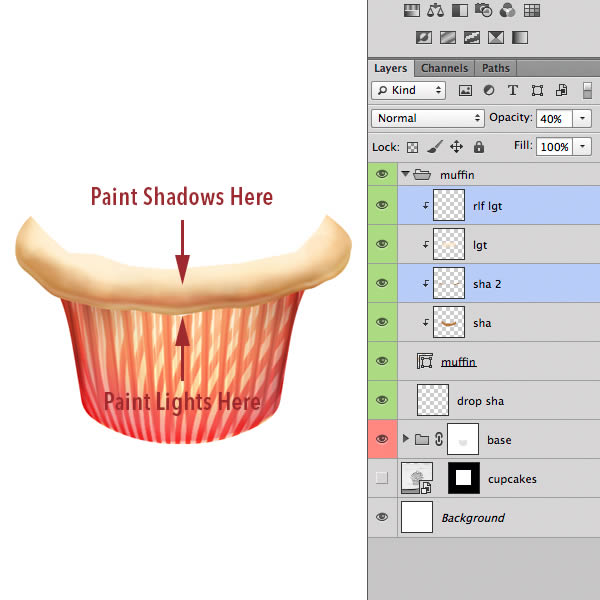
Step 18
Load the muffin texture and apply it as a clipping mask just above the base muffin shape layer. Use a layer mask to hide some portion of texture in the sides and set the layer blending mode to Luminosity. Tip: if you like, you can use the Spot Removal Tool (J) to clean some texture artifacts as I do.
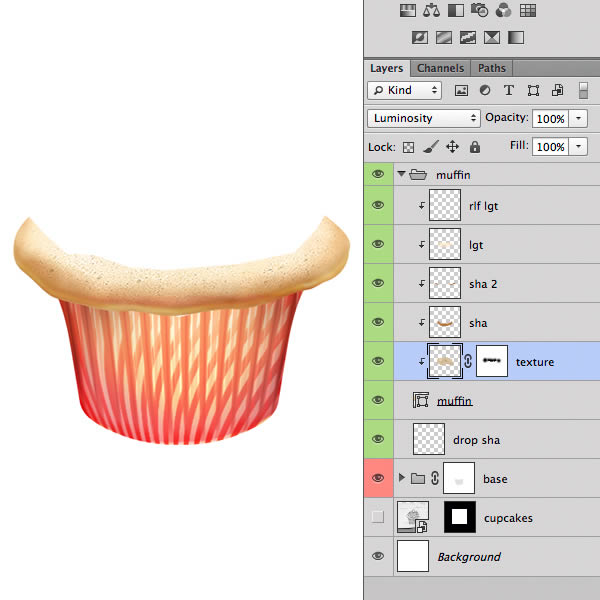
Step 19
Apply a Color Balance Adjustment Layer to add a more brownish looks to the muffin. The previous version had a subtle color cast. Set (16,0,-5) for Highlights, (13,-10,-33) for Midtones and (0,0,57) for Shadows. Check Preserve Luminosity too. Finally set the Opacity to 40%.
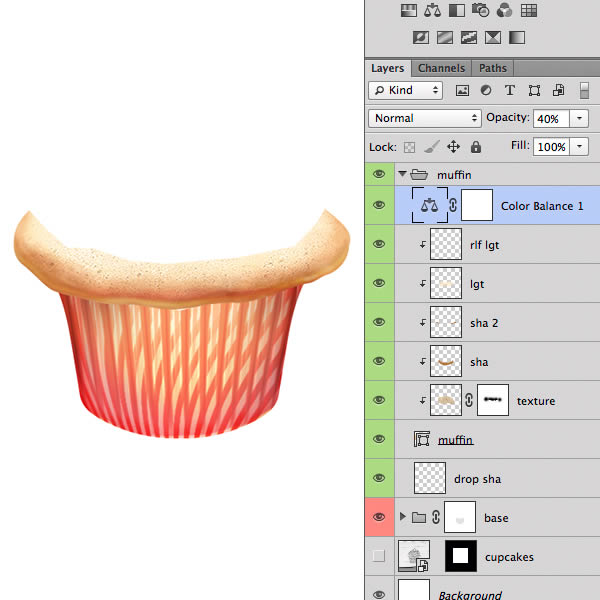
Step 20
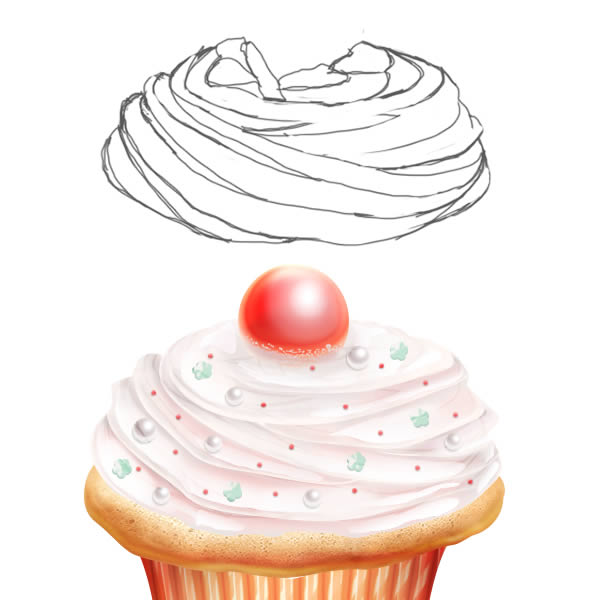
Well, now it’s time to make the cream. Select your trusty Pen Tool (P) and draw shapes like below using a lighter color than the base cream color. I activated the Trace Path visibility only for visual purpose but you don’t have to add the black stroke to the path.
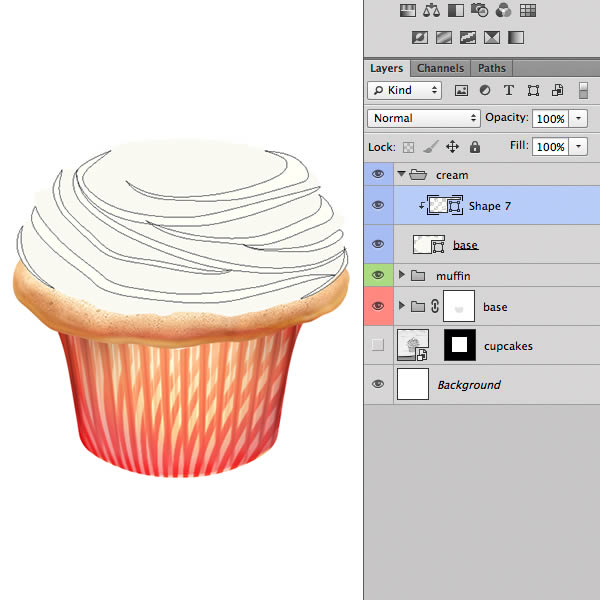
Step 21
Add a new layer below the last one as a Clipping Mask, then with the Brush Tool (B) paint soft shadows on the bottom part of each shape with this color (#938e82). Use the Smudge Tool if needed to refine the transition between the shapes. If needed decrease the opacity to 50%.

Step 22
Apply a Layer Mask to the first shapes layer to hide the edge and create soft transitions.
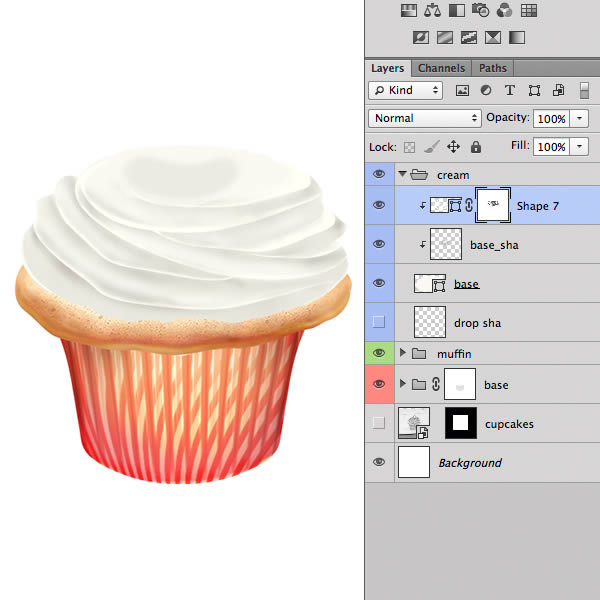
Step 23
To create some color variations, paint a yellow color inside the cream as below. Set the blending mode to Overlay.
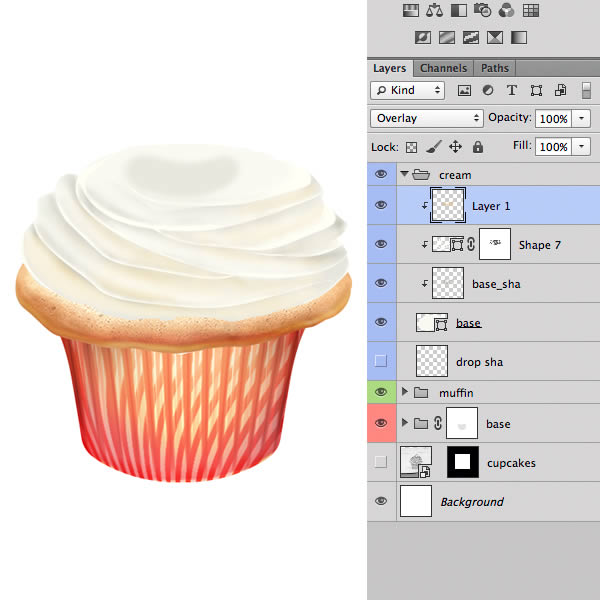
Step 24
We’ll add some reflection using a simple but very effective method. First add a new blank layer, then with the Lasso Tool (L) make a selection inside a cream layer. Now using the Gradient Tool (G) fill the selection with a White to Transparent gradient. It’s important to make the right selection, don’t try to full fill a cream layer but preserve some dark cream gap between each reflection. Apply this technique to the entire cream shape. Tip: When you’re done try to duplicate the layer to boost the effects!
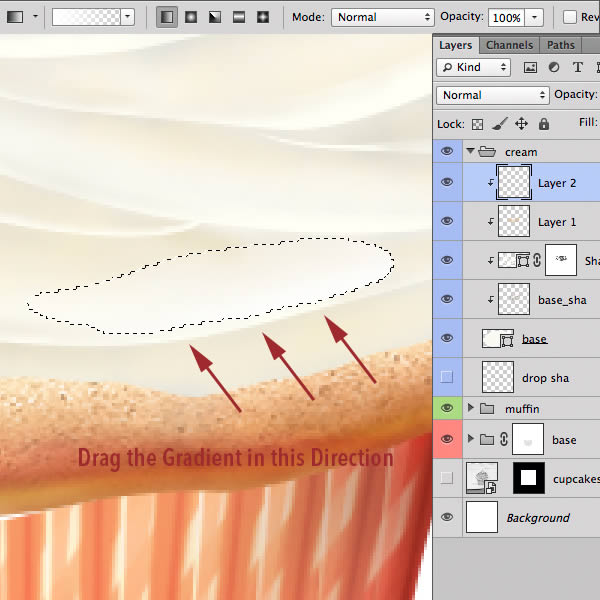
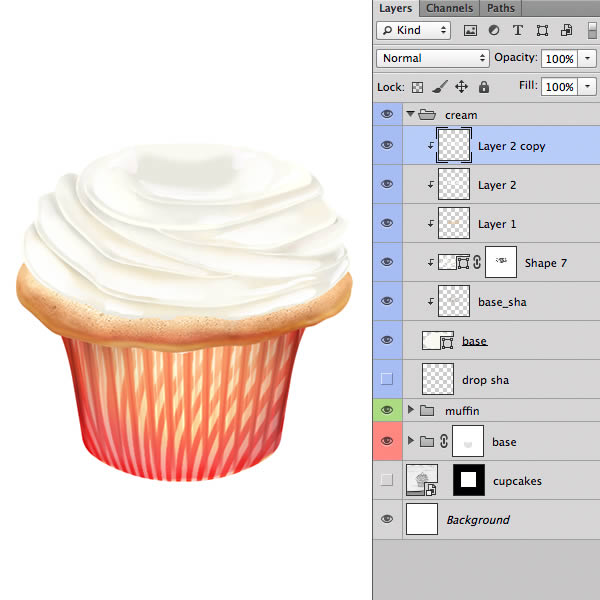
Step 25
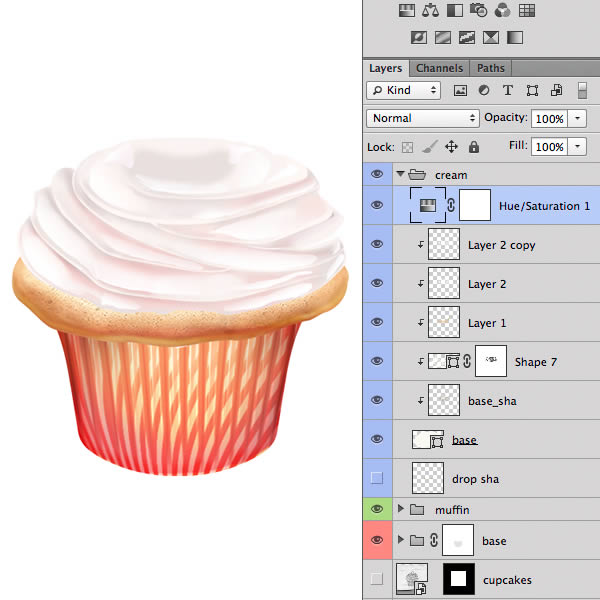
Honestly I prefer strawberry cream flavor. Let’s add a Hue/Saturation Adjustment Layer to give a pink look to the cream. Set the Hue to -40 and Saturation to + 10.
Step 26
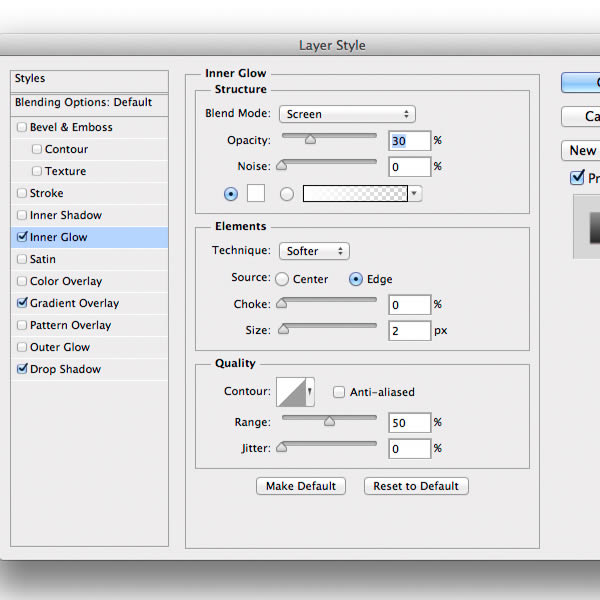
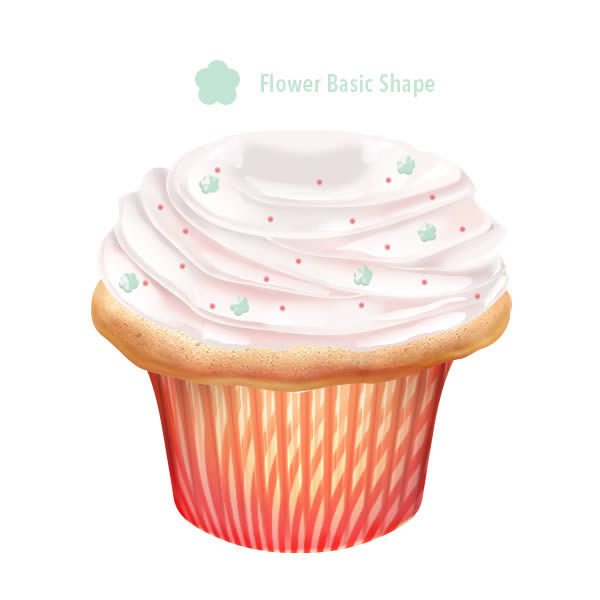
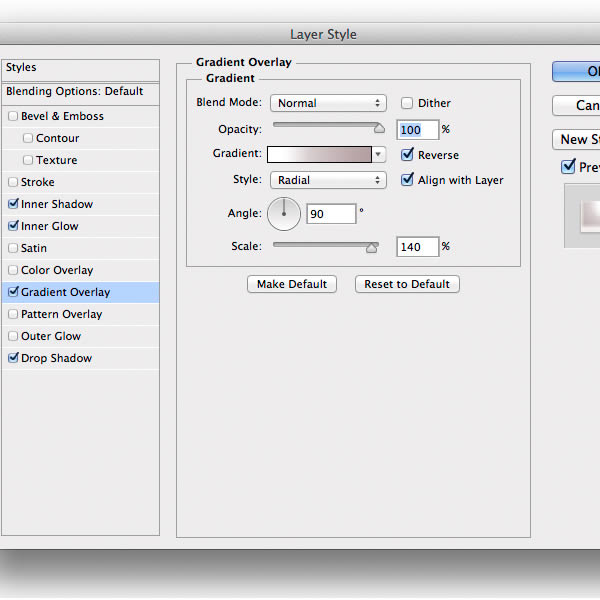
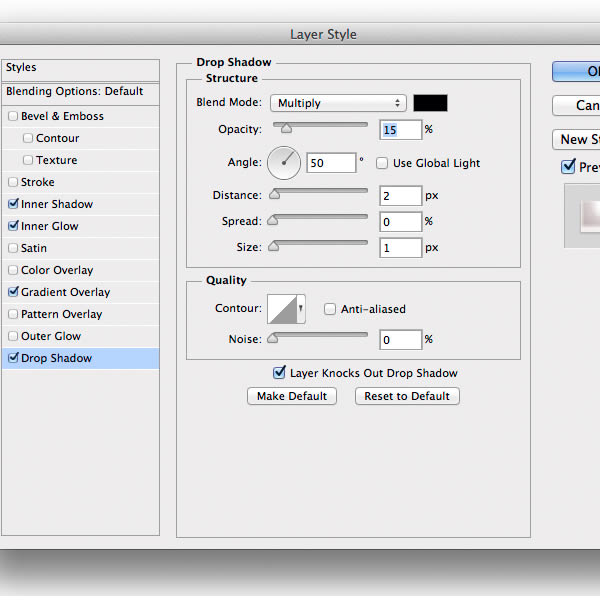
Time for decorations. I make them with Layer Styles and custom shapes. Those little red spheres have this Layer Style.
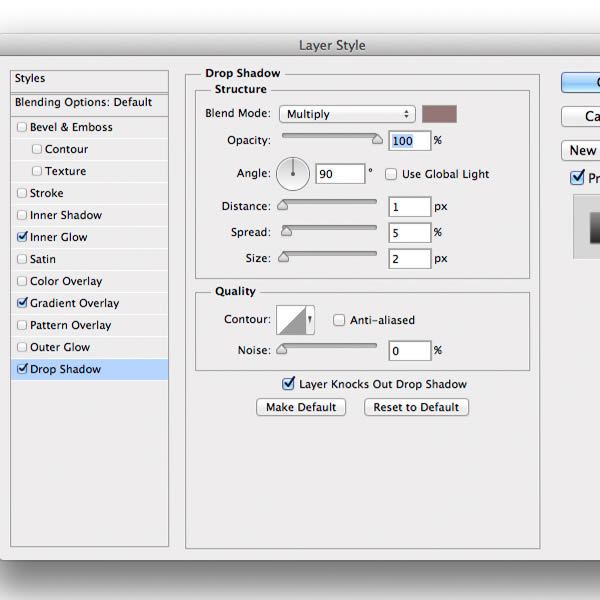
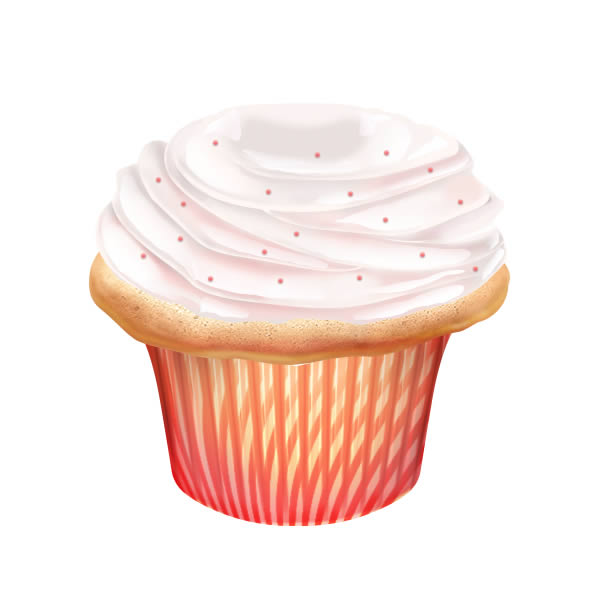
Step 27
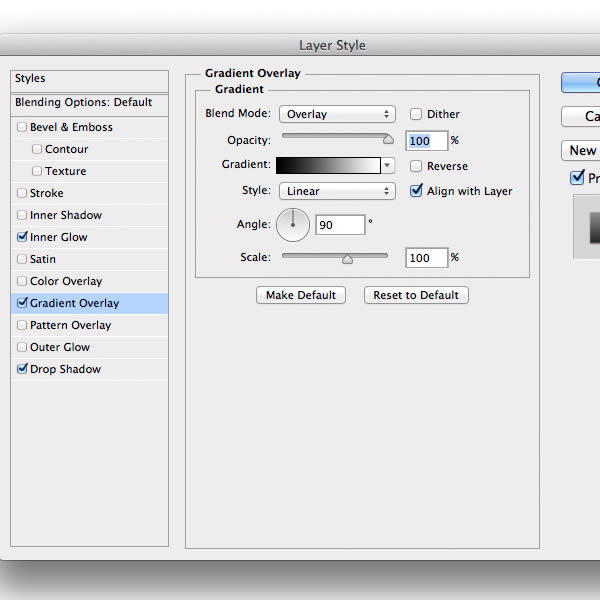
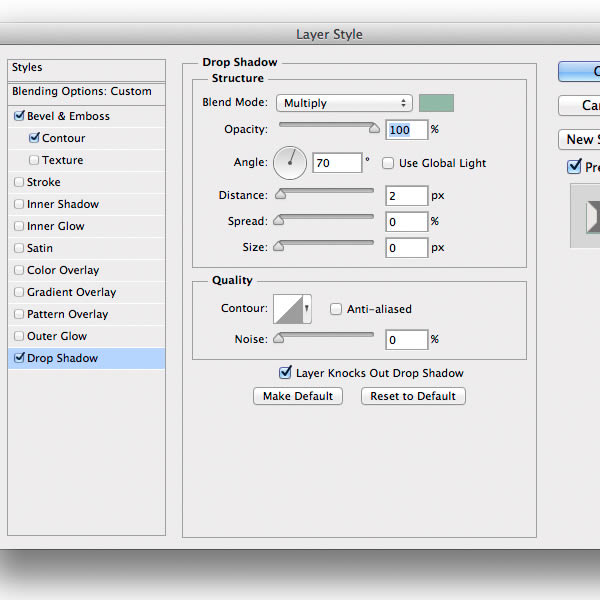
Layer Style for the pale green flower shapes.
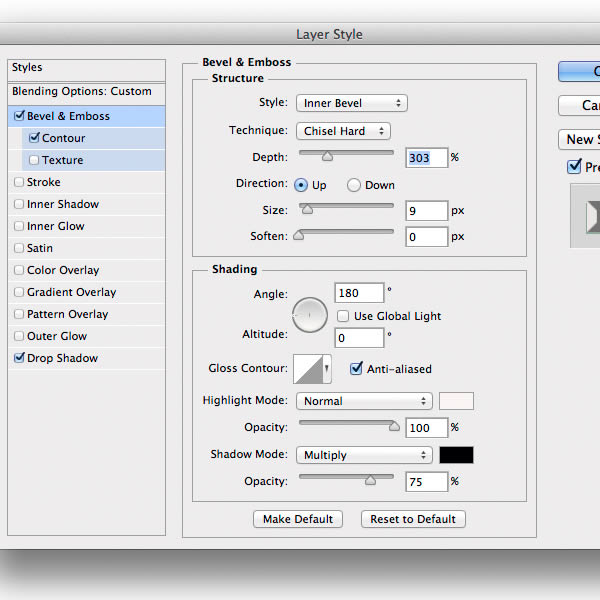
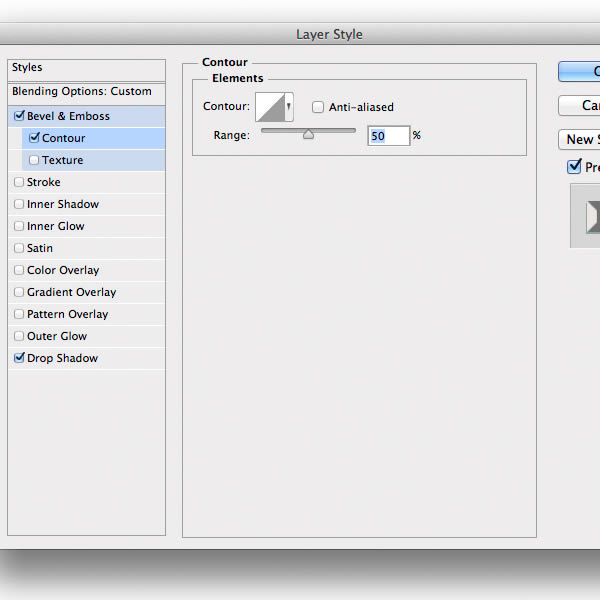
Step 28
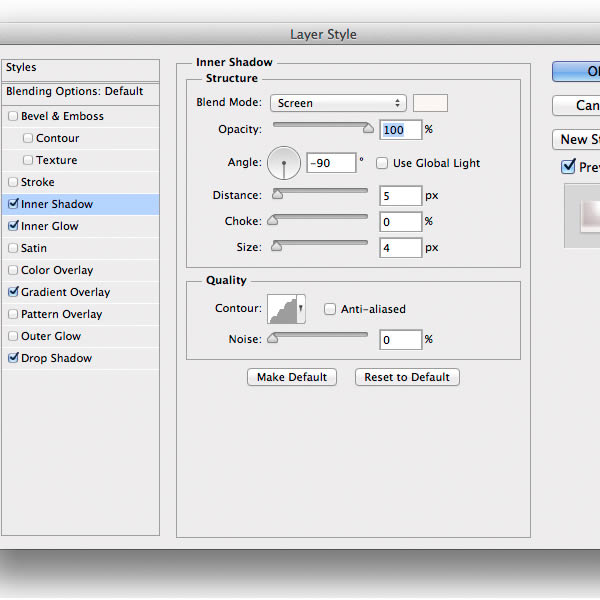
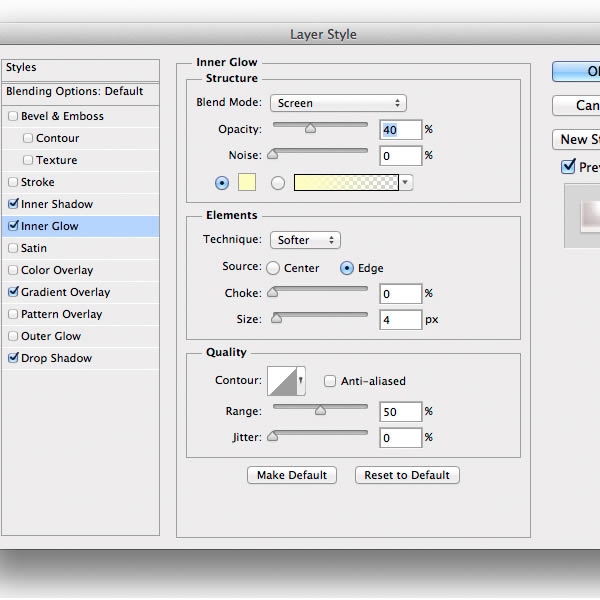
And the Layer Style for sugar ball shapes.
Step 29
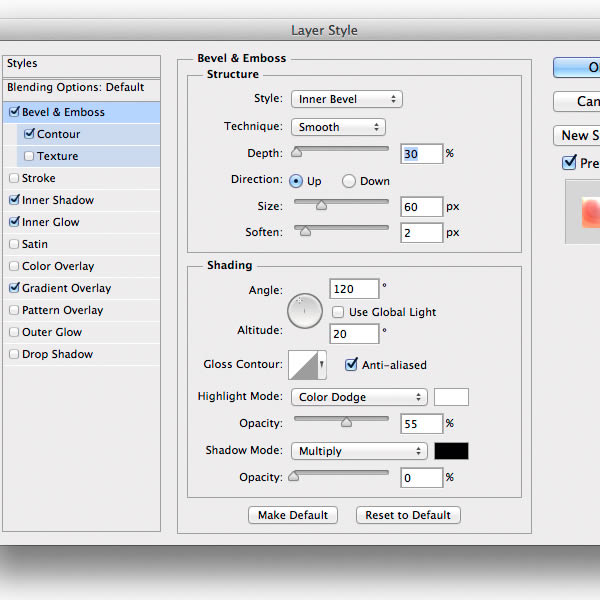
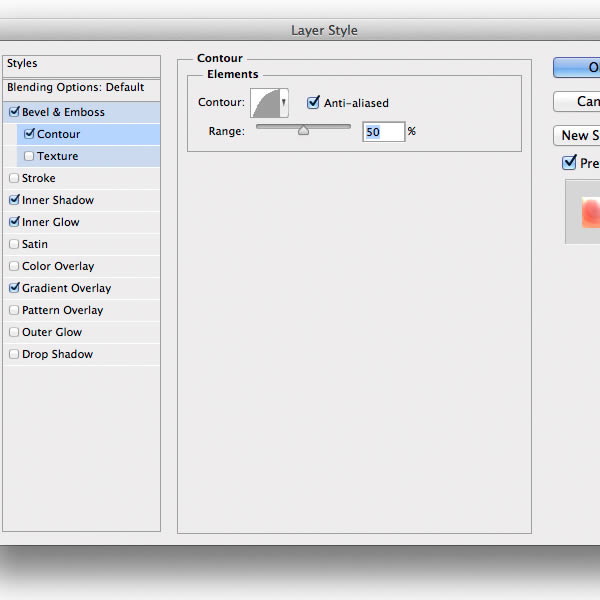
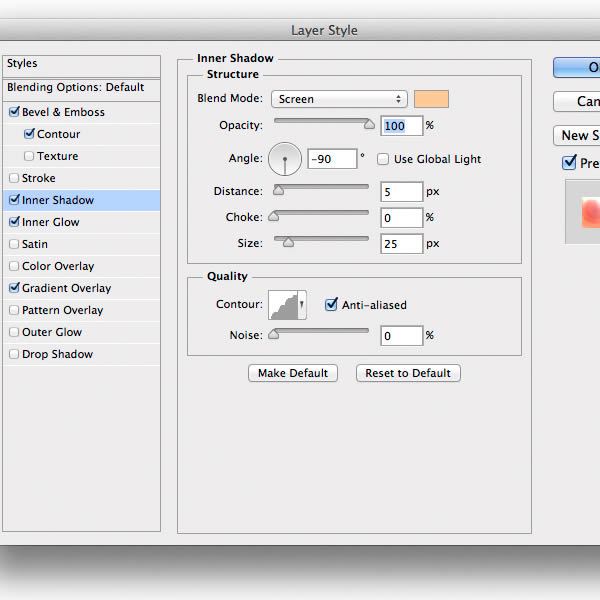
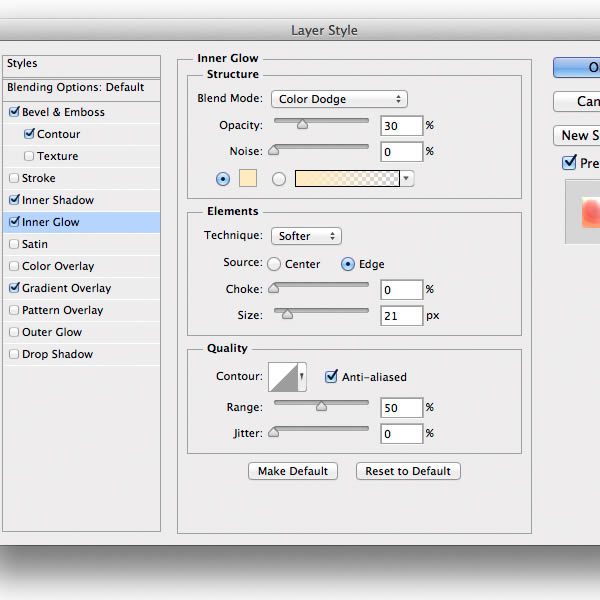
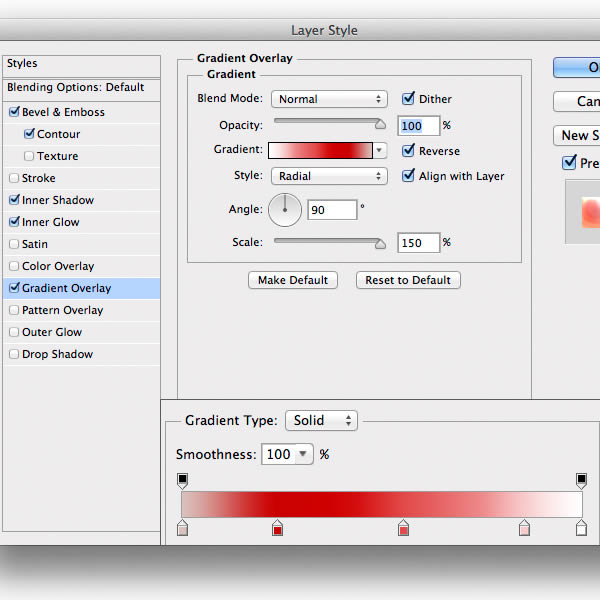
Add a big red round candy shape on top of cupcake. To do this Use the Ellipse Tool (U). Then apply the Layer Style below, yes only one Layer Style to render an awesome sphere. I added a mask to the candy layer and hide some small part with a very small hard brush too.
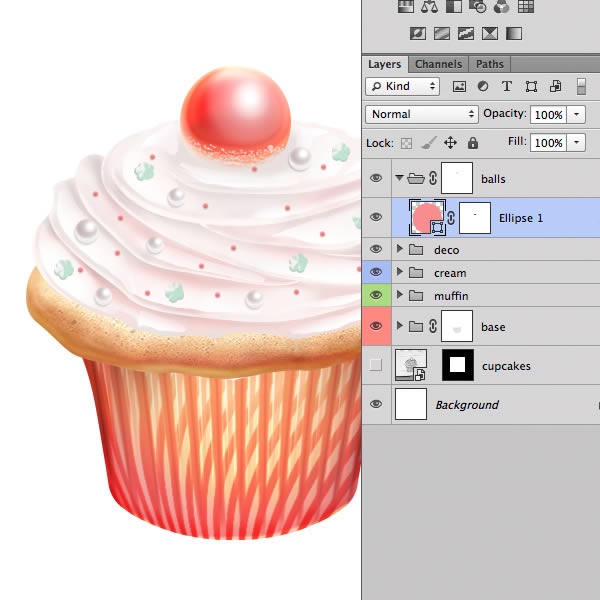
Step 30
In a new layer paint with a soft brush a shadow on the bottom of the candy with this color #e2b8b1.
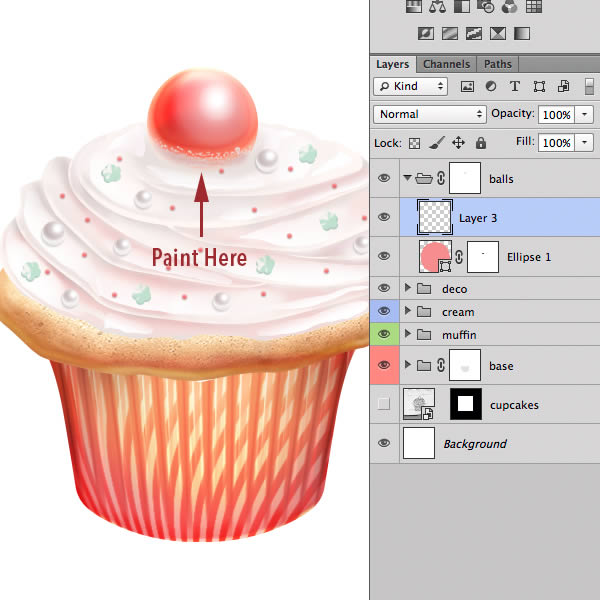
Step 31
Almost done! Now we’ll add some refinement to the whole icon. First I added a Curve Adjustment to boost the contrast.
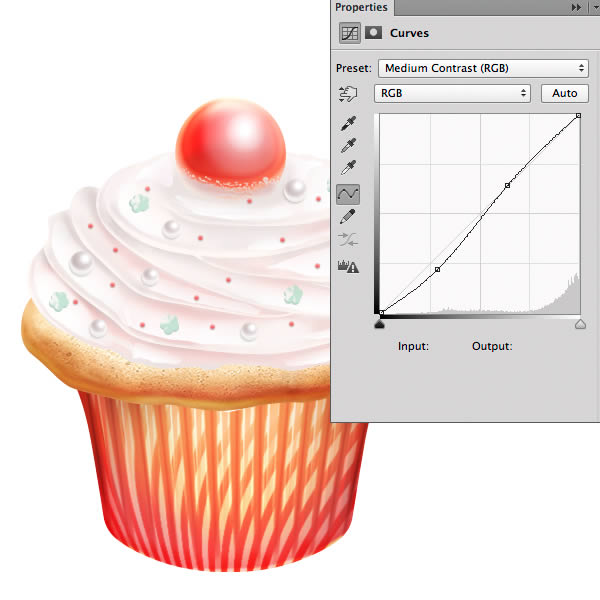
Step 32
Then Load a Selection of the cup by clicking on the layer thumbnails while pressing Cmd/Ctrl. Then Select the Gradient Tool (G) and draw an Orange to Transparent gradient. Set the layer blending in Color Dodge.
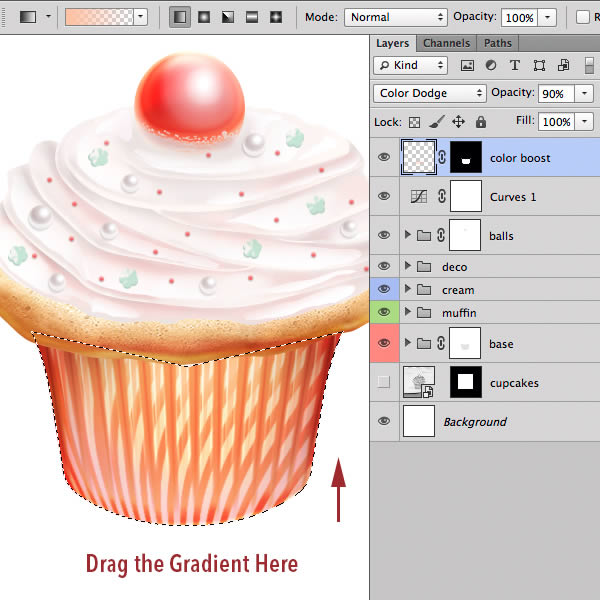
Step 33
Draw some casual black lines inside a new layer below the Red Candy layer with a small hard brush, and set the blending mode of the layer to Soft Light, decrease the opacity to 60%. This will create subtle crack inside the cream.
Step 34
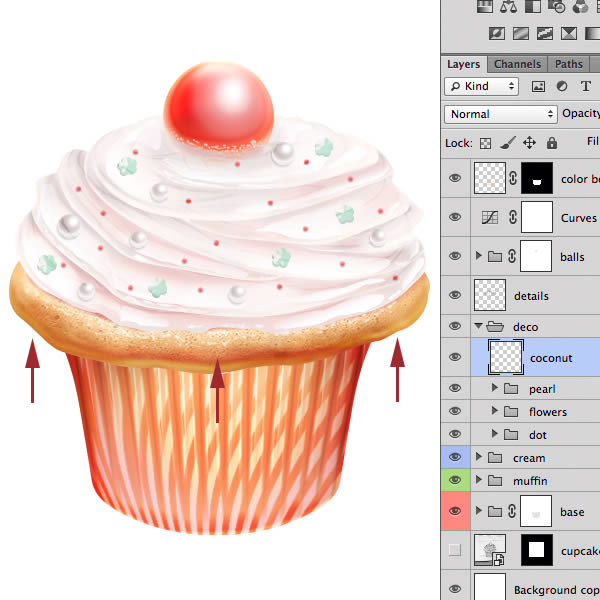
Inside a new layer, refine the details on the muffin. For example, I added very subtle shadow below the cream and some coconut grain. To do this, use a very small hard brush and paint with white color.
Step 35
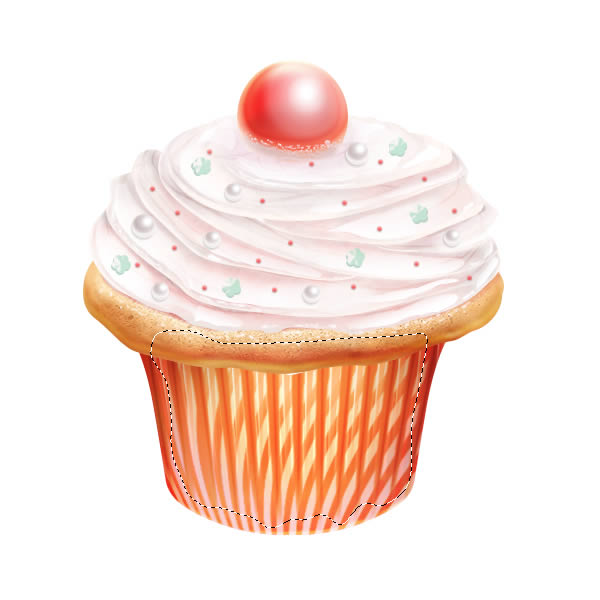
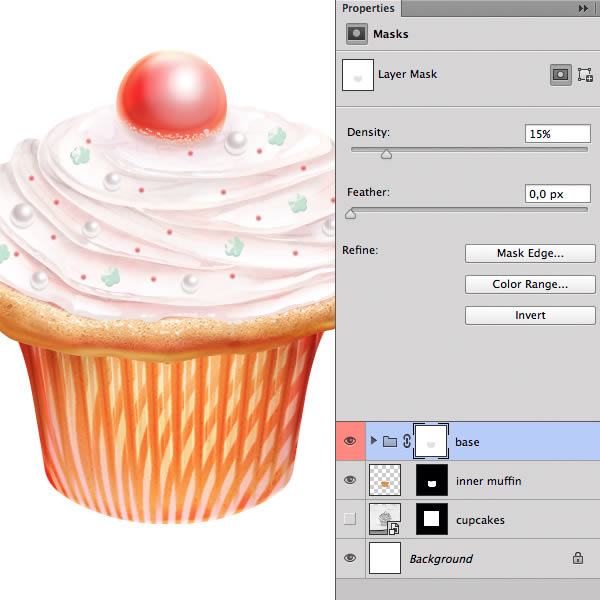
With the Lasso Tool (L) make a selection like below to the cup. Add a Layer Mask with the current selection to the cup group. Then in Mask Panel, decrease the Density of the mask to 15%. Fill the gap by adding a new layer with the muffin texture used before, place the texture below the cup group. This will add a nice transparent effect to the cup material.
Final Image
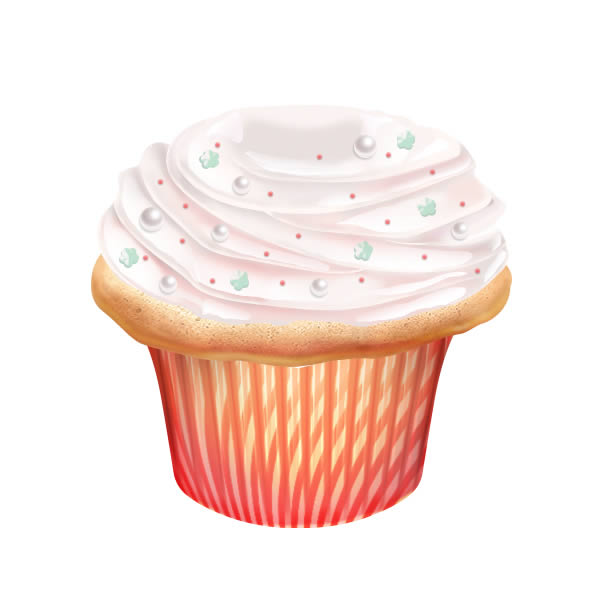
Now, just add a colorful background and you’re done!


{ 0 komentar... read them below or add one }
Posting Komentar